
Body Tub Rotisserie
My Spit
Tips
Projects
Links
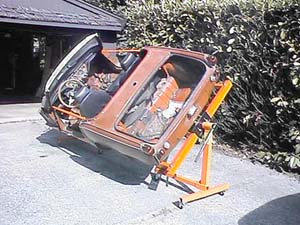
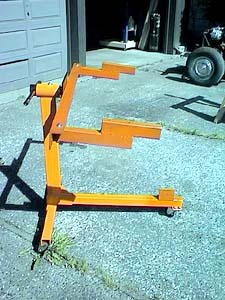
| Small cars like Triumph Spitfires, MGB's, Austin Healys and others fit well on this type of body stand. It's built around a pair of heavy duty engine stands typically found for around $40 each. This entire project will not exceed $150 and will be worth the money the first time you need to get to bottom side of your body tub. It completely breaks down and can still be used for engines. Build it nice enough and you might even be able to rent it out to fellow enthusiasts! |
 |
||||||||||||||
|
The materials list is more of a suggestion than a rule.
Most of this project is made up as you go along since there are a lot of
variables that you can run into that will be unique to your situation.
These are the materials I happened to use in my project though. Bolt
sizes varied from 5/16" to 3/4" in size and up to 6" or more long.
Since materials will vary depending on what you have available, so too
will the fasteners. I looked in the yellow pages for a metal supplier
and found one that had the materials I needed. It turned out they
had a yard full of scrap as well and they gave me their surplus metal prices
of $0.20-$0.30 a pound for whatever I found. New bar stock typically
can run $3.00 a foot so it pays to shop around!
|
||||||||||||||
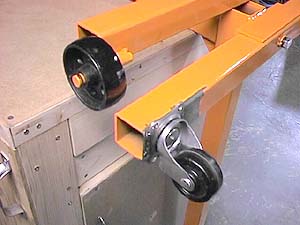 |
The engine stands need to be modified. All the designs
I've seen so far have two fixed wheels in the back and a swivel caster
in front. While this works fine if the weight is on one stand alone,
it doesn't work in pairs. Part of the reason I wanted to build this
was to be able to move the whole body tub in any direction around my garage,
including around the corner for storage. Those fixed rear wheels
had to go!
|
||||||||||||||
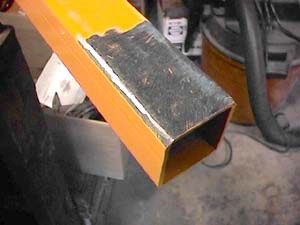
| I ground the welds for the short stub axles using a 4" angle grinder. A hacksaw could work as well, but power tools are just so handy. |
 |
||||||||||||||
 |
There are some square U bolts out that would have JUST
fit the tubing and the available mounting holes on the caster, but it was
questionable if it would work. I decided to weld it instead.
TIP!When welding with an arc welder, it is inevitable that
metal will splatter and get everwhere- including inside of the caster which
required a lot of cleaning for it to swivel freely. After doing that
to two wheels, I figured out that I could use twisted copper wire to wrap
around the exposed joint forming a gasket. When I welded these casters,
nothing got inside and it kept the cleaning job to a minimum.
|
||||||||||||||
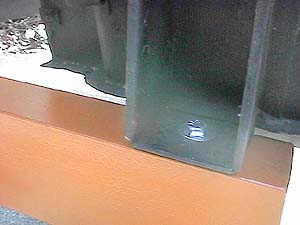
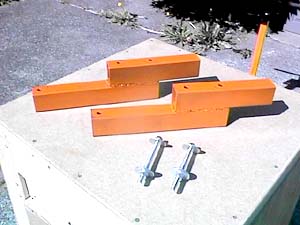
| Fabrication is pretty simple. The front bracket is made of the 4" angle iron cut just a bit wider than the two front body tub mounts. The bracket is bolted to the engine stand using the 3/4" bolts that come with the stand for use with the original engine mounts. 5/16" bolts 1.5" long are enough to hold the body tub securely at the original mounting locations. |
 |
||||||||||||||
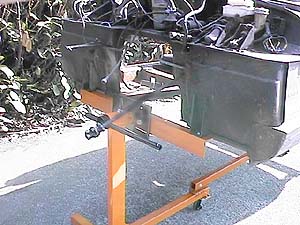 |
The body mounts in front are the lowest point on the body
tub at the firewall so when you mount it this way, you still have full
access to the entire front of the body tub. Handy!
|
||||||||||||||
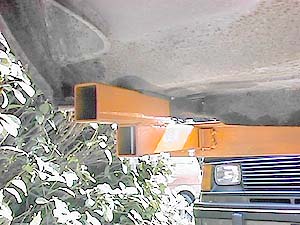
| The rear bracket is a mirror of the first, but the angle iron is cut to 47" long. I drilled and mounted the angle iron to the engine stand the same way as the front was done. The next step was to come up with a way to securely attach to the body but not block any painted body work. I found that the rear bumper mounts on Mk I-III Spitfires would allow for easy attachment if I made an offset bracket. Using two pieces of rectangular tubing, I was able to weld up the assembly. The upper piece is 10" long while the lower piece is 12" long. They overlap by 5" and it is there that you drill two 1/2" holes all the way through the entire assembly. I used two 6" bolts to mount through the tubing. I did weld this tubing together, but I still rely on bolts when I can. |
 |
||||||||||||||
 |
Hold the bracket up to the bottom of the body tub and
mark the hole locations from inside the boot area. If you look carefully,
you'll see I also welded a pair of small angle braces to the main crossmember
to keep the brackets from shifting laterally when the body tub is rotated.
|
||||||||||||||
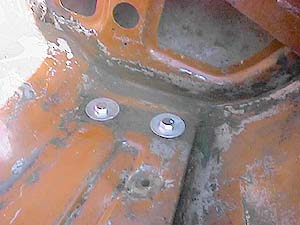
| Here is the total area covered by the bracket inside the boot. This is where the steel brackets usually sit for the bumper mounts and is a very strong location. I don't give measurements since this may be unique on your car if it has ever been in an accident and is no longer stock. |
 |
||||||||||||||
 |
The brackets are bolted to the main crossmember with vertical
bolts through the top part of the angle iron. This means all the
weight of the tub is pulling against the bolt forwards and pushing against
the bottom part of the angle iron. A good reaon to use 1/4" thick
bar stock! Anything less would be prone to twisting with the body
weight.
|
||||||||||||||
| By using bolts instead of welding these brackets, I can fully disassemble
the entire affair. There are smaller right angle braces on the underside
of the angle iron that keep the arms from moving laterially under load.
Note the piece of angle iron welded to the bottom. This is to hold a piece of steel (the remainder of the 2x3 tubing) to connect the two stands at the base. This is CRITICAL. Otherwise when you go to move the whole assembly with a body tub in place, the two stands will fight against each other by moving at different times. This ties them together into one stronger unit. |
 |
||||||||||||||
 |
Here you can see the lower brace in place when the stand
is in use. Note how the brackets tuck under the rear valance and
leave it completely clear so that you can work on the body without anything
in the way.
|
||||||||||||||
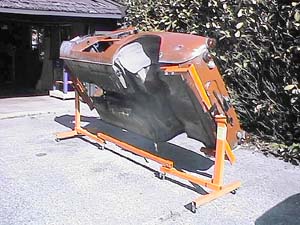
| Here's the whole assembly all finished up and ready to be put to work. I painted all the metal with Plasticote Chevy Orange engine paint. It's tough, resists most solvents, and works well. Best of all, it matches the orange of the stock stands so it looks good too. |
 |
||||||||||||||
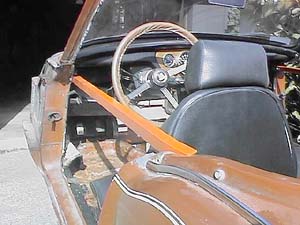 |
Because a convertible gets most of its strength from the
chassis, it is crucial to provide a brace across the door jambs to prevent
the whole thing from folding up like a taco when you lift it off the chassis.
It doesn't take much to tweak it enough to give you door fitting headaches
later. A simple 36" piece of angle iron bolted between the jambs
works well. I cut and bent the brace a bit to make it fit closer
to the body tub, then welded it. Once done, it was bolted in place.
Note the bright orange color meaning it's another piece of shop equipment.
|
||||||||||||||
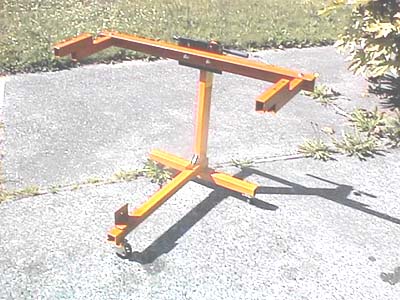
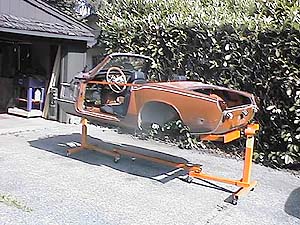
| Using an overhead hoist I was able to bolt the front stand into place and then the rear. Once that was done, connect the brace at the bottom to connect the two and you can safely disconnect the overhead hoist. It is now a mobile work platform. |
 |
||||||||||||||
 |
One chassis plus one body tub equals one Spitfire!
Hmm, I wonder if I could build a rotisserie for the chassis too?
|
||||||||||||||
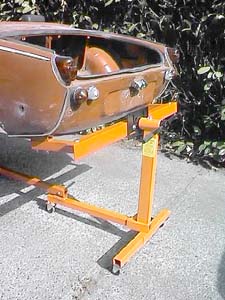
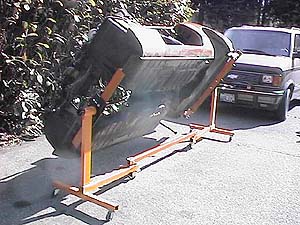
| Tilting is delicate. The stands have stops at certain angles, but they are pretty extreme. The tub cannot rotate 360 degrees. The center stands for the engine stand would have to be about six inches taller to clear the lower mounts, but that puts the body work too high for me to be comfortable in working. |
 |
||||||||||||||
 |
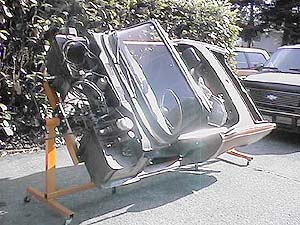
This is the stock angle position for the engine stand
and for me it's just fine. This gives very good access. I may
add outriggers to the stands to keep it from tipping over though.
It's stable now, but if it leaned much more, it could go over and I'm wary
of it. Easy thing to add.
|
||||||||||||||
| Eay to replace sills when the whole bottom of the car is at chest level. |
 |
||||||||||||||
|
Imagine banking your car on the high banks of Talledega!
with this stand you could, but I wouldn't advise it.
|
||||||||||||||
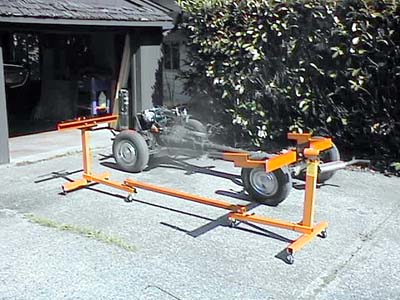
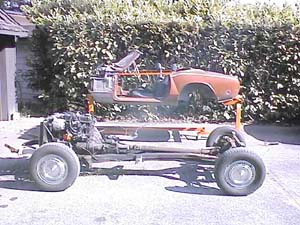
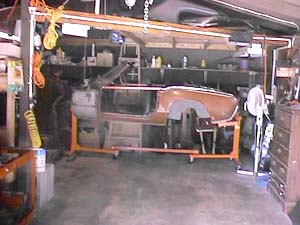
| One of the main reasons I wanted to build this stand was to allow me to turn the body tub sideways in the garage and allow me to have a work area to rebuild the chassis. It's a success! it was an easy project, though longer than anticipated and took a toll on some drill bits, but it's a good project to build your own shop equipment. It has a lot of possible future uses and I now have something that makes working on the car that much easier. Good luck in building your own rotisserie! |
 |